Guides
IRON NEST Map Icons and Symbols
Separate your own plotting marks, friendly observations and hostile target information.
Evidence map reviewed: 2026-08-17
Color conventions are documented in community guides; exact icon art and labels must be checked against the current build.
Quick answer: what the map symbols mean
IRON NEST uses the tactical map as a working firing board. Blue numbered markers preserve friendly spotters, green lettered markers preserve named reference points, and red numbered markers represent hostile targets after their position has been solved. The large IRON NEST model is your firing origin, not decoration.
Use the symbol type to decide the next action, not just to name the icon. A blue spotter belongs in the observation stage, a red target belongs in the firing-solution stage, and a skull belongs in the result-check stage. If the problem is locating a target from reports, continue with the triangulation guide. If it appears during the second mission, use the Mission 2 walkthrough beside this glossary.
 123
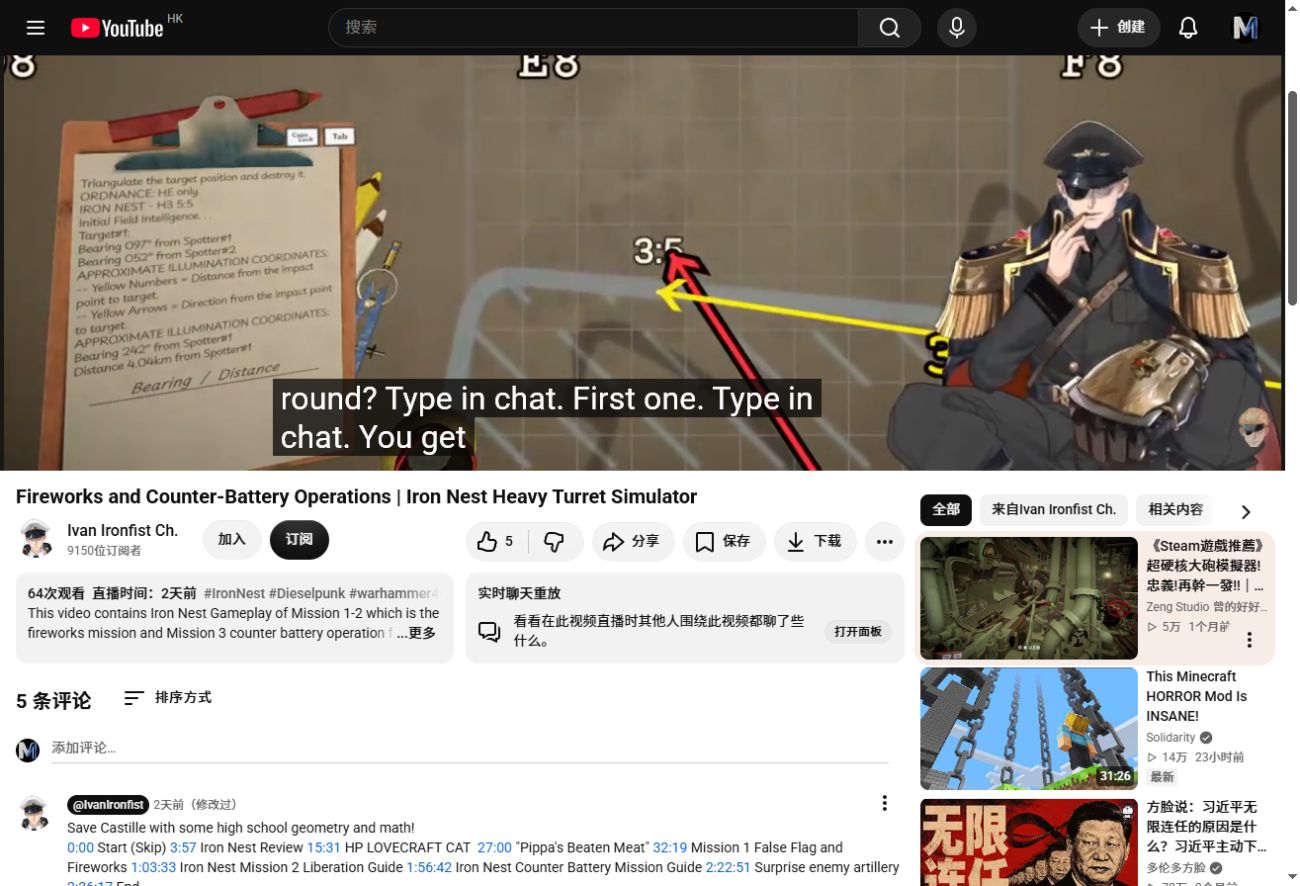
123- 1The clipboard carries the current order, spotter bearings and correction information.
- 2Construction lines extend observations until they meet at a target candidate.
- 3The plotted point is measured again from the IRON NEST before bearing and range are sent to the gun.
Release-version Mission 1 footage. The exact mission coordinates vary, so the annotations identify interface roles rather than supplying an answer key. v1.0 gameplay source
Main tactical-map icon glossary
| Symbol or tool | Meaning | When to use it |
|---|---|---|
| Large IRON NEST model | Current turret position and the origin of the final firing measurement | Place it first; move it whenever the platform redeploys |
| Blue numbered token | A spotter or other friendly observation source | Save each reported spotter position so later bearings use the correct origin |
| Green lettered token | A named landmark or reference point from an order | Preserve locations that High Command may reference again |
| Red numbered token | A hostile target whose position has been established | Place it at the solved intersection, then measure from the turret |
| Red skull | Confirmed hostile destruction | Separate finished targets from active targets |
| Blue skull | Friendly units were also hit | Treat it as a targeting failure and recheck the solution |
| Red pencil | Final bearing and range measurement; copies the result | Use only after the target position is settled |
| Yellow pencil | Construction measurement without copying the result | Use for spotter bearings, intersections and checks |
| White pencil | Visual line without a measurement | Use for temporary layout that should not become firing data |
| Compass or iris tool | Range circle or visual effect-radius estimate | Compare distances without replacing the final measurement |
Fast lookup: what should you do after identifying the icon?
| What you see | What it tells you | Best next page |
|---|---|---|
| Blue numbered spotter | Start the reported bearing at this friendly observation origin; do not measure the gun solution from it. | Spotter positions |
| Two observation lines | The supported crossing is a target candidate. Recheck observer IDs when the lines produce a wide uncertainty area. | How to triangulate |
| Red numbered target | The hostile position has been established well enough to measure from the IRON NEST. | Calculate bearing |
| Red or blue skull | You are reading an impact result, not a fresh target instruction. Confirm what was destroyed before reusing the map. | Mission troubleshooting |
How spotter symbols fit the firing workflow
A spotter icon is not the target. It stores the origin of an observation. Plot the blue spotter at the reported coordinate, extend its bearing with a yellow construction line, repeat the process for a second reliable observation, and place the red target token where those lines intersect. Only then draw the red final line from the IRON NEST to that target.
This distinction explains why searches for “IRON NEST spotter,” “map icons,” and “map symbols” lead to the same operational problem: players need to know which object is evidence, which object is the solved target, and which line becomes the firing solution.
Three common map-reading mistakes
- Measuring from a spotter to the target. That reconstructs an observation; it is not the gun bearing.
- Leaving the IRON NEST model at its previous position. Every later range and bearing will inherit the wrong origin.
- Using the red pencil too early. Construction lines can then overwrite or copy incomplete data into the firing workflow.
Frequently searched icon questions
Are red map icons always enemy units?
Red numbered target markers are used for hostile positions after the player has established them. A red skull represents a confirmed hostile destruction instead. Read the marker shape and mission state together rather than treating every red object as a new target.
What is the difference between map symbols and spotter icons?
“Map symbols” is the broad category. A spotter icon is one specific friendly observation origin within that system. The spotter supplies evidence; the solved red target and the final line from the IRON NEST supply the firing solution.
Why does a correct-looking icon still produce a miss?
The marker may be right while the firing line is wrong. Confirm that the final measurement begins at the current IRON NEST position, then carry its range and bearing into the bearing and elevation workflow as one matched solution.
Version and accessibility note
Patch #4 added three colour-blind modes on August 12, 2026. If colours are difficult to separate, enable one of those modes and rely on token shape, number or letter as well as colour. Community guides document the blue/green/red convention, but exact art and labels can change between builds.